Variables store data and always start with $.
$name = "John";
$age = 25;
| echo | |
|---|---|
| Can output multiple strings | Outputs one string only |
| Faster | Slightly slower |
| No return value | Returns 1 |
Marketers are always seeking new ways to elevate website engagement and maximize interactivity. Yet, managing the countless third-party integrations and tracking tools implemented to enhance their business can quickly become overwhelming and chaotic. That's when Google Tag Manager comes to the rescue. With its intuitive and user-friendly platform, managing, updating, and tracking the snippets, tags, and integrations on your website has never been easier. From improving website performance to boosting conversion rates, Google Tag Manager offers the solution to streamline your digital marketing efforts and revolutionize your online presence.
Drupal 9 makes integrating with Google Tag Manager easy and effortless. The Google tag manager module in Drupal lets you quickly add, modify and remove tags on your website without touching any code! Read this easy step-by-step guide to learn how to integrate your Drupal 9 site with your Google tag manager.
The PHP configuration file, php.ini, is the final and most immediate way to affect PHP's functionality. The php.ini file is read each time PHP is initialized. in other words, whenever httpd is restarted for the module version or with each script execution for the CGI version.
PHP allows us to choose whether or not to display errors to users. There are three ways to enable or disable error reporting in PHP:
Method 1: You can turn the display error parameter in the php.ini file on or off. When it’s on, errors are shown; when it’s off, there are no errors shown or reported. To do this, locate the display error parameter in the php.ini file, then set its value to “on.” Restart the web server's various services. The PHP script's errors will now be visible to end users. Set the display error parameter to “off” to stop reporting errors. The off argument indicates that users won't see any errors.
Method 2: Using the mini set() function is the second way to enable or stop error reporting. The ability to modify the configuration options in the php.ini file is a built-in feature of the PHP programming language. It requires two inputs: the name of the setting you want to change and the value you want to assign.
Method 3: You can also utilize the error reporting() function, a native PHP function, to enable error reporting. This function controls which PHP faults are reported and sets the error reporting directive during runtime. Given that PHP has multiple error levels, this method also aids in setting the various levels for the runtime (duration) of your script. This function accepts parameters for error names like E ERROR, E WARNING, E PARSE, etc., allowing these errors to be reported.
We only get three built-in content types at the backend when we install WordPress, i.e., posts, pages, and media. However, today WordPress has become quite flexible and advanced.
The approach to adding more post types also has expanded. The diversified usage demands more content types because posts, pages, and media are not enough, and here is where WordPress custom post type comes in handy.
Custom post types are used to convert a regular WordPress website into a content management system. As the name suggests, you can use custom post types to create various content types for your website.
Besides that, one can find several post types available by default in WordPress installation, including:
Custom post types are used to convert a regular WordPress website into a content management system. As the name suggests, you can use custom post types to create various content types for your website.
Besides that, one can find several post types available by default in WordPress installation, including:
WordPress supports an unlimited number of Custom Post Types. You can create your custom posts and call them up wherever you want.
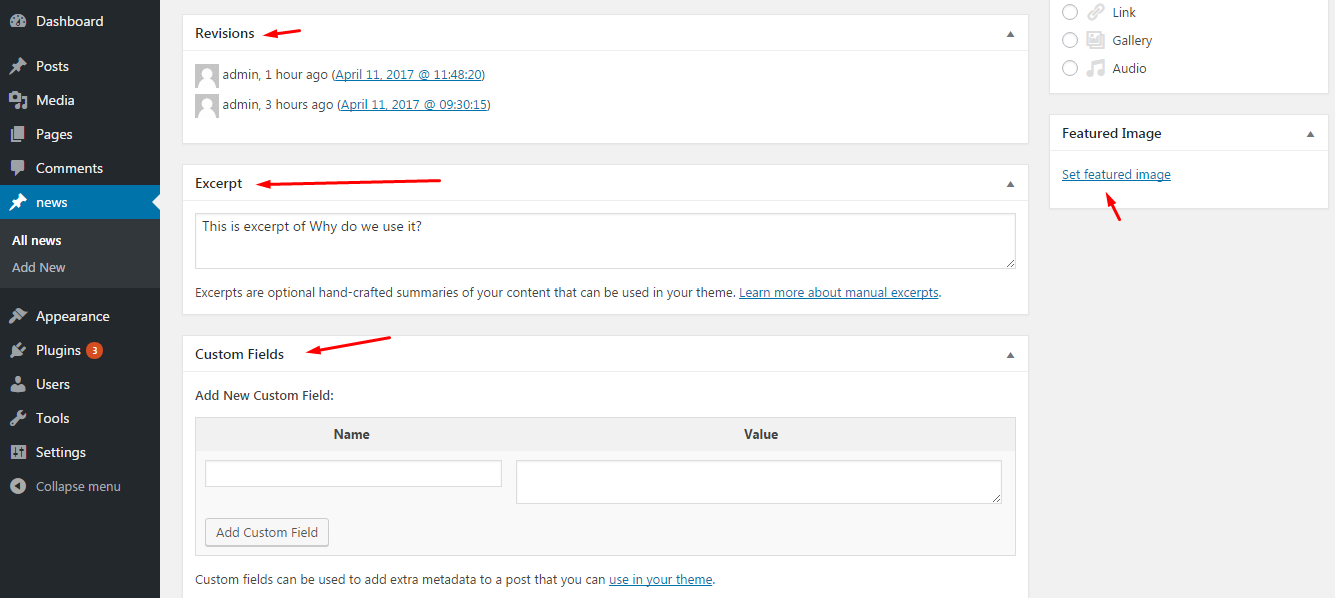
For example, if you run a News website and want to add a custom post type titled “News.” Once created, the news post-type would have its own menu in the WordPress dashboard admin area. Additionally, you can create multiple post types, such as Movies, Portfolios, etc.
Follow the steps below to create a custom post type on a WordPress website:
$supports: Specifies that the post type is compatible and supports all essential features.
$labels: Specifies that the post type is referred correctly to the admin area.
$args: Specifies a permalink slug of the news and a menu position located just beneath the Posts menu.
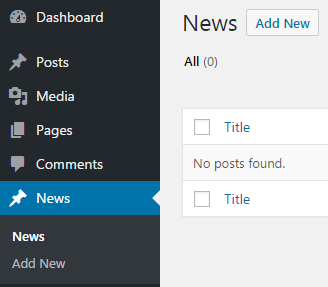
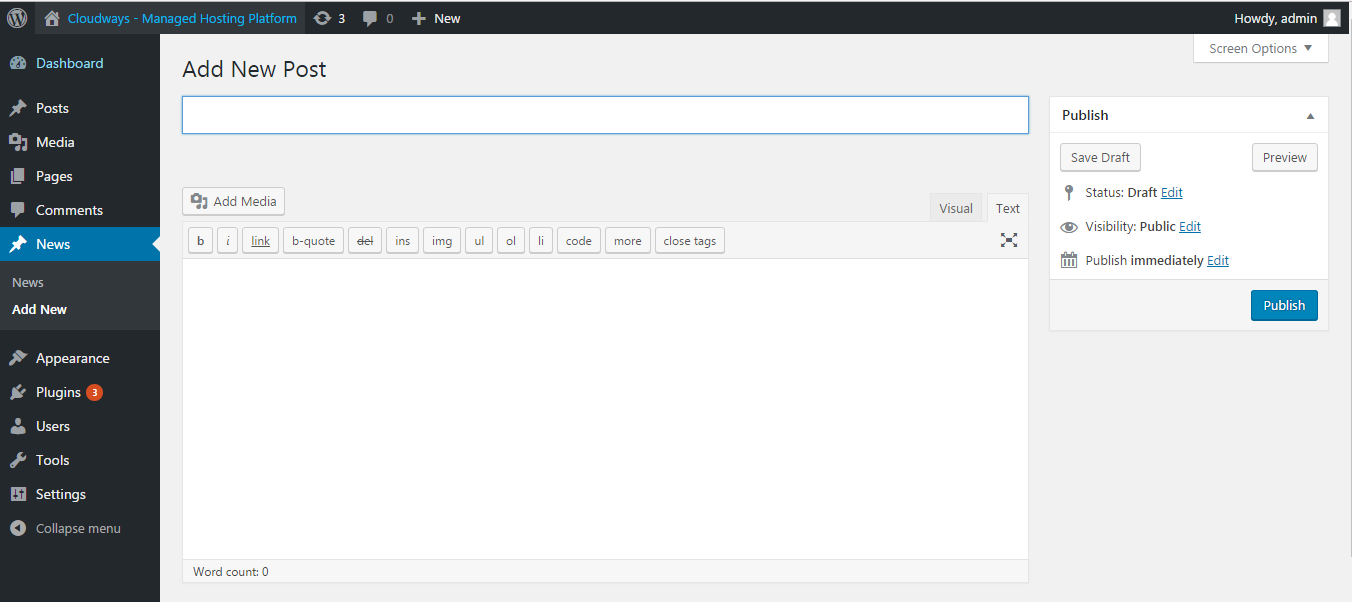
Now let’s take a look at before and after adding custom post features to our WordPress website.
– Before adding features
– After adding features
The steps above tell how to register WordPress custom post types to the backend of any theme. Now let’s learn how to add a custom post on a WordPress website.
You can create a new custom post on your WordPress website by following the steps below:
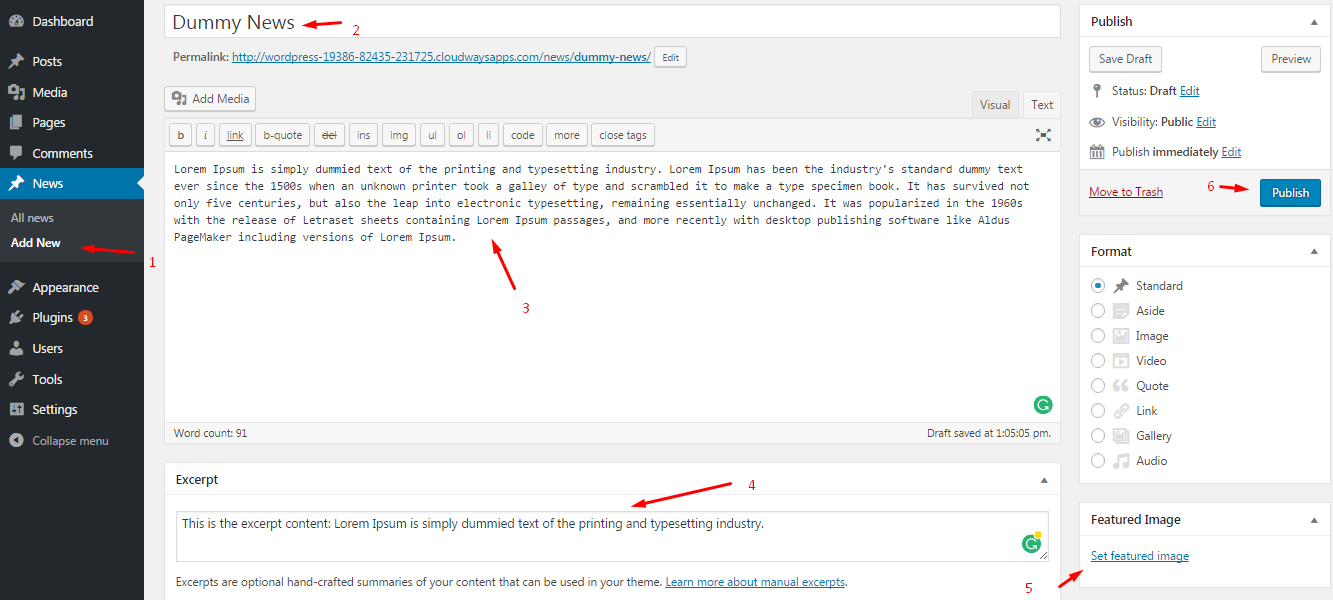
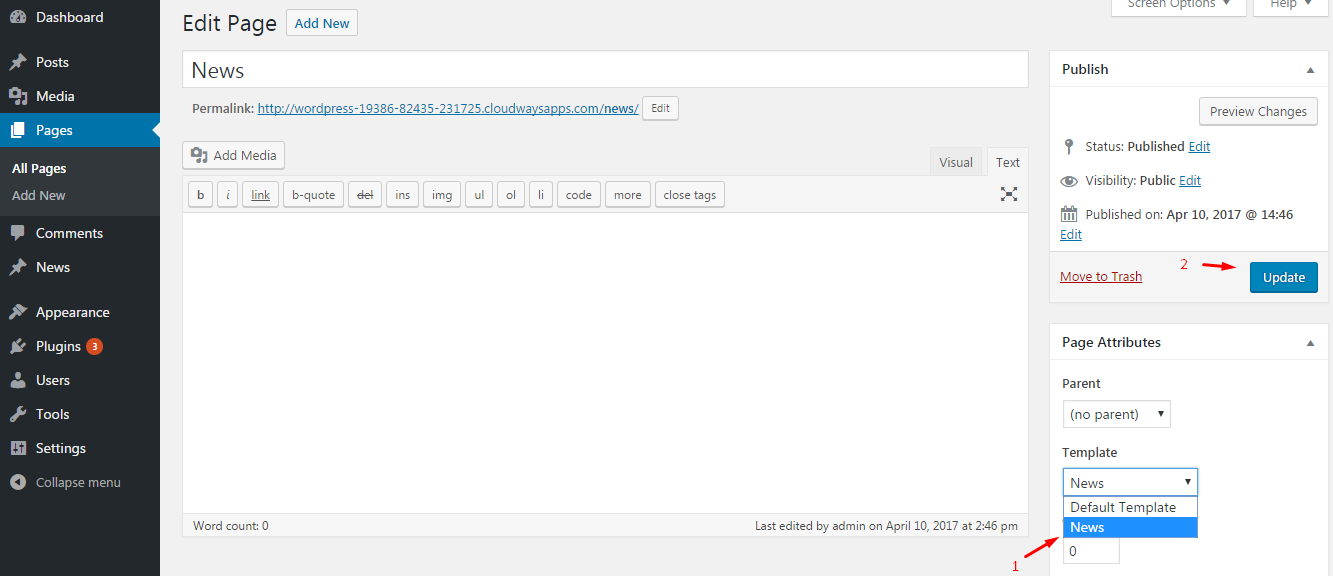
Creating a template and fetching a list requires creating a new file named template-news.php.
Refer to the image below for the visual representation of the above steps:
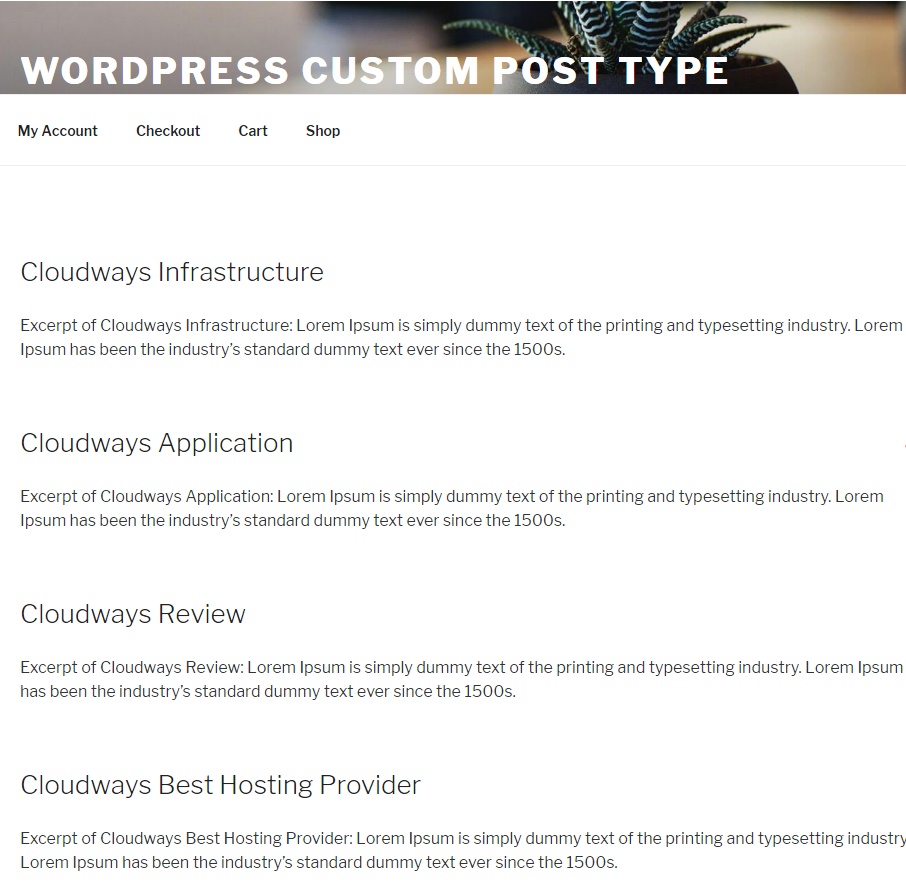
The image below represents the final display of your listing page:
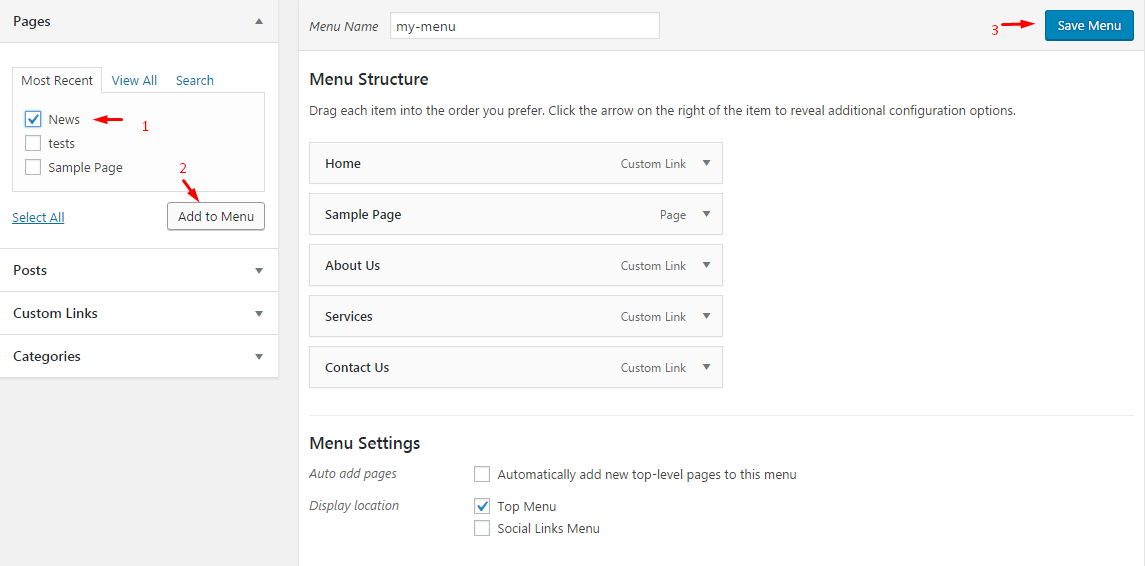
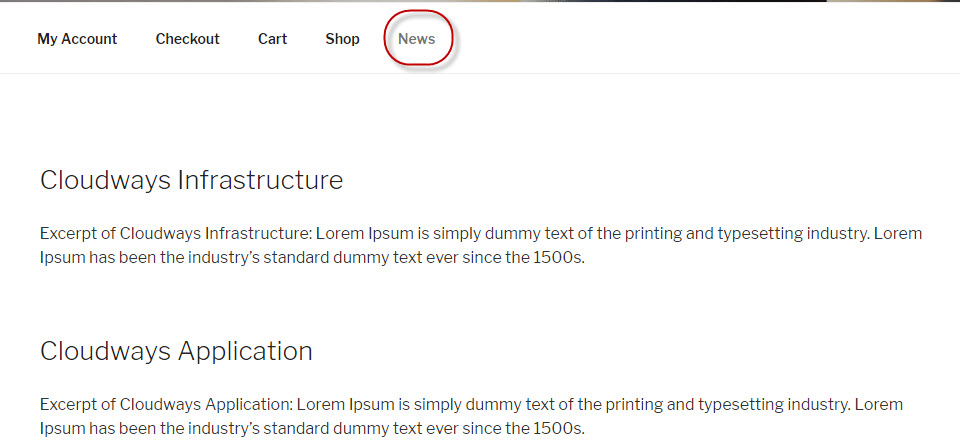
Add your custom post type as a part of the Menu options on your WordPress website by following the steps below:
For further reference, check out the image below.
And this is how your website will look on the front end. Check out the image below:
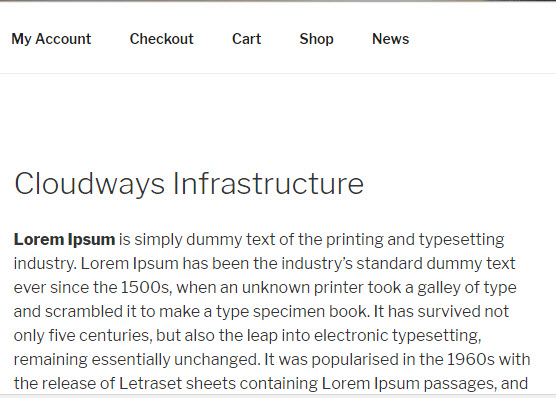
Create a “detail” page for custom post type by following the steps below:
Now it’s time to see what your detail page looks like:
You have now learned how to create a Custom Post Type in WordPress, which is quite complex but can be easily done by following the steps mentioned in this blog. Check out our other blog posts for more helpful guides on managing your WordPress site, such as reducing WordPress load times. Shall you have any queries or suggestions regarding the blog, feel free to comment below.